Adding cameras from a remote network
This system allows you to quickly add large numbers of cameras from a separate network.
How does it work?
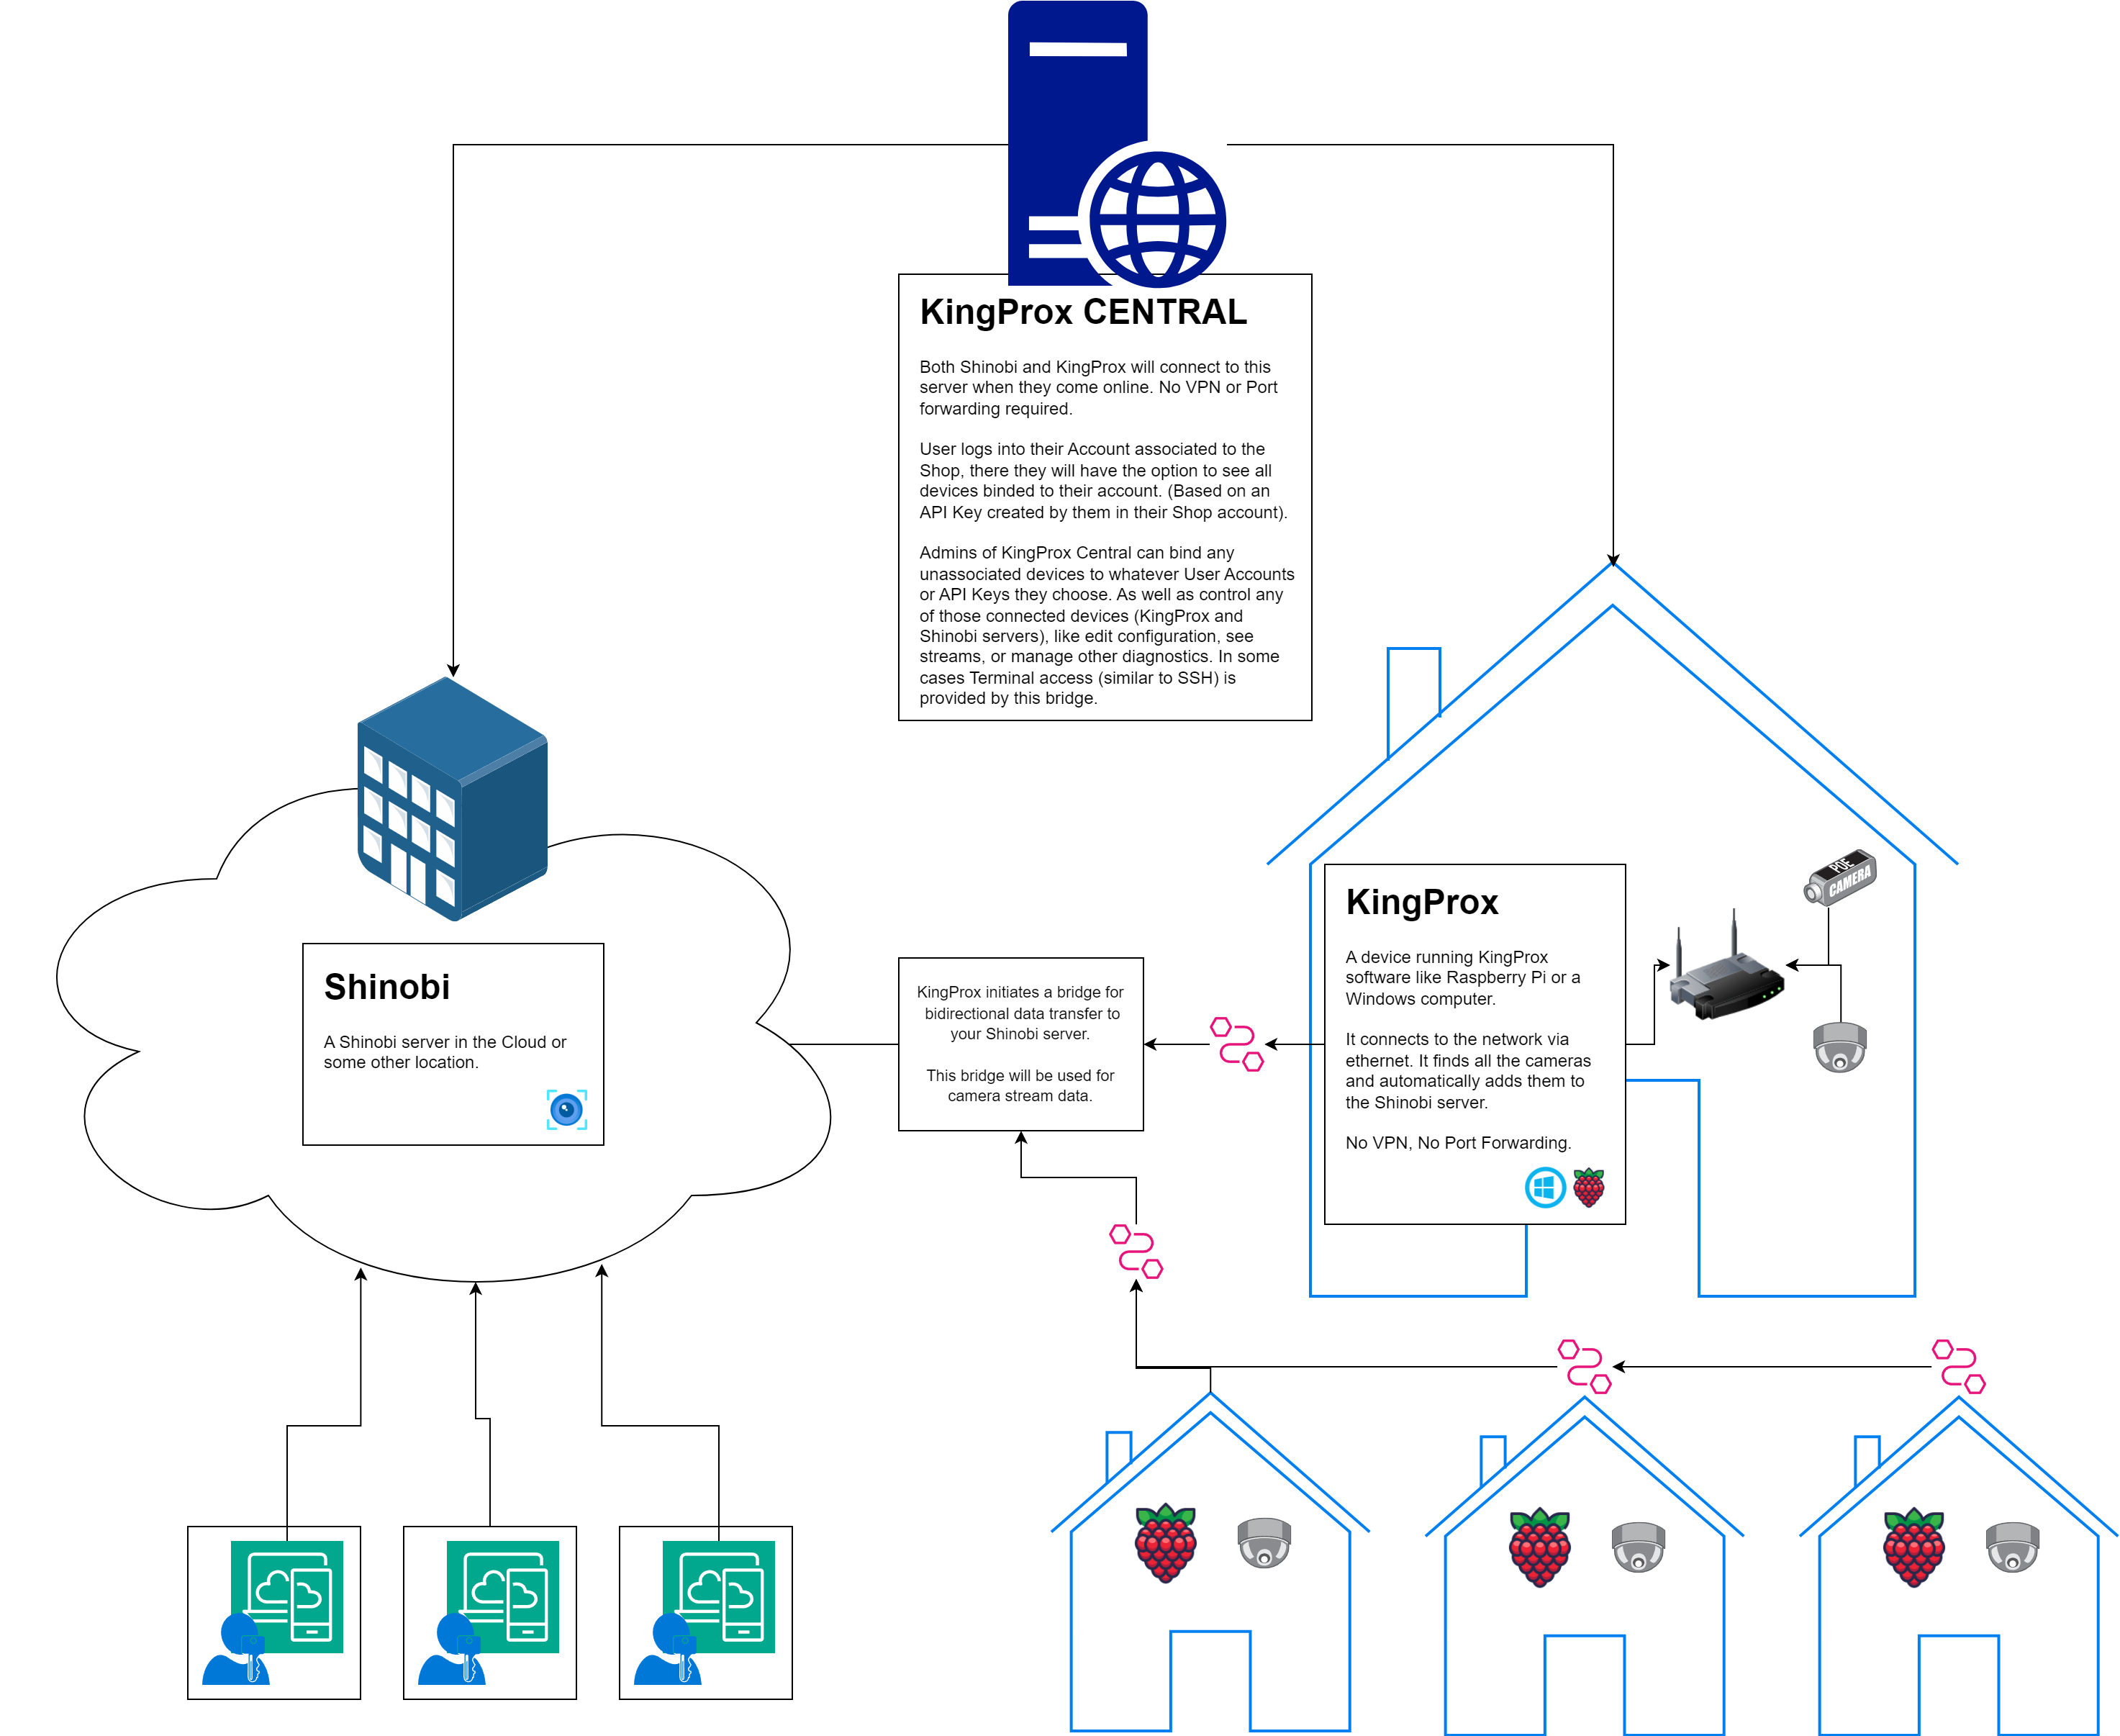
Very simply, there are 4 main pieces.
- Camera Peer Server Module for Shinobi : Enables a port (8335 by default) on your server to allow KingProx devices to connect.
- KingProx : Scans the network, begins streaming cameras and bridges a connection to your Shinobi
- ShinobiNetwork (shinobi.network) : Here you can see which servers are connected using your Peer Connect Keys.
- ShinobiShop API Keys, they will be used as the Peer Connect Keys.
Get an API Key from your ShinobiShop Account
This can also be done on https://shinobi.network, they use the same login.
You create an API Key in your Account page if you are a School, Reseller, or Subscriber. At present Keys are only created in the ShinobiShop. shinobi.network will have the ability to create keys in the future.

View full size diagram. This is a highly simplified representation of how it works. Please let us know if you have any questions.
Camera Peer Server Module for Shinobi
It's only purpose is to give Shinobi the ability to allow connections from KingProx so that it can allow the following actions.
- Automatically adding cameras to Shinobi
- Allow live stream data to be given to Shinobi
This module is only vended by a Shinobi Systems representative for business partners at the time of writing this article. In future you may find it appearing in our Module Market. Contact us through the Live Chat if you would like to become a partner.
Setup the Camera Peer Server Module
- Download the provided zip package. Inside you will see kingProxPeerServer.
- Copy the kingProxPeerServer folder to your Shinobi folders libs/customAutoLoad folder. It would exist as libs/customAutoLoad/kingProxPeerServer.
- Login to your Shinobi server's Superuser panel. Restart Shinobi to enable it.
- Get a new API Key from your ShinobiShop account.
- Back to the Superuser panel, open the Easy Remote Access tab and input the key there.
KingProx
A device running KingProx software like Raspberry Pi or a Windows computer.
It connects to the network via ethernet. It finds all the cameras and automatically adds them to the Shinobi server.
No VPN and No Port Forwarding required for this device. It initiates the connection to a reachable Shinobi server and keeps a bridge open. Shinobi then sends its requests for data through it, like the live stream data.
Setup the KingProx Device
- Download the KingProx zip package.
-
Extract the zip folder anywhere. Inside you will find an executable and a json file. Copy the json file and rename it to conf.json.
- Edit the conf.json file and change the userAccess array to have different usernames and passwords. These logins will only be used to access the KingProx device as well as the streams from the cameras the device has gained access to.
-
Run KingProx. Depending on the Operating System you are using you may need to use Terminal.
- Linux : chmod +x KingProx-linux && ./KingProx-linux
- Windows : Double click the exe.
- macOS : Double click the script or run it like Linux.
- Open web port 8333 of your KingProx device. So if the IP address of your KingProx device is 10.0.0.12 then open http://10.0.0.12:8333 in your web browser.
- Login with the set credentials. Default username is shinobi and password is shinobiP.
- Get a new API Key from your ShinobiShop account.
-
Back to KingProx, Open the Configuration tab and put the API Key in the Peer Connect Key field.
- Additionally configure the Shinobi server your KingProx device will connect to. Change localhost to be the IP of your Shinobi server in both Peer Server and Endpoint fields.
- Once Saved, restart KingProx.
To daemonize KingProx we currently only can suggest using something like PM2. In future releases it will have the daemonization included.
ShinobiNetwork
The central hub where you can access and re-pair your Shinobi and KingProx devices. Login to shinobi.network with your ShinobiShop username and password.
Once logged in you will see your Shinobi server and KingProx devices appearing in the panel. Here you set which KingProx Devices are allowed to connect to your Server. Open the "Accepted Peers" dropdown for your Shinobi Server and select the KingProx device to allow it access to your Shinobi.
This step of allowing connectivity can also be done on the Shinobi server but would need to be done through the configuration manager in the Superuser panel or via the conf.json in Terminal. Add the following :
"peerConnectKeys": ["YOUR_KING_PROX_PEER_CONNECT_KEY"],